

Materials and Tools
- miter saw
- drill with 1-1/4" spade bit and 1/4" twist bit
- screwdriver
- tape measure
- sanding block or orbital sander
- various sandpaper up to 220 grit
- (1) 4' direct wire LED utility light
- (3) 1x4 x 8' boards of any species
- wood glue
- (2) 3/16" x 2" stainless steel eye bolts
- decorative lamp cord
- end plug to match installation condition
- 3/8" electrical strain relief conector
- 1/16" stainless steel cable or decorative chain/rope
- wood putty
Cut the 1x4s To Size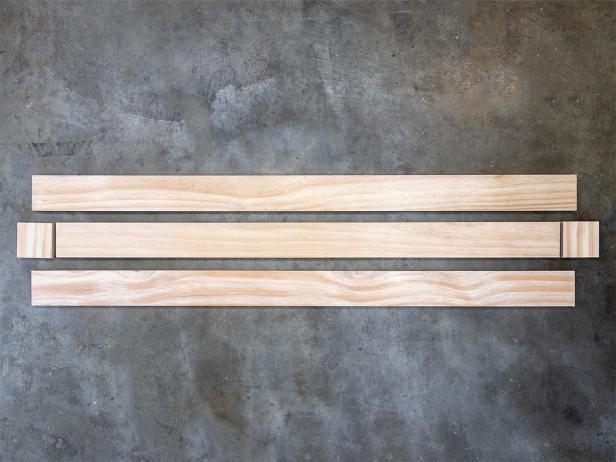
Cut one of the 1x4s to 50” and leave the ends square. This forms the top piece that the fixture will screw into. Cut two of the 1x4s to 54” to form the sides and, paying attention to the direction of the grain, cut two end pieces 3-1/2” x 3-1/2”
Sand Everything to Perfection

Sand all of the wood to a perfectly smooth finish. Start with paper as rough as 80 grit if necessary and work down to 220 grit. You want this to look perfect so make sure to run your hands over the wood as you sand until it feels perfectly smooth.
Disassemble the Light Fixture
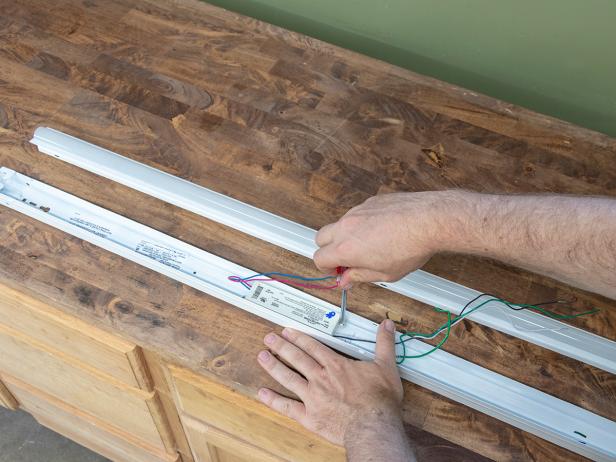
Take apart the light strip so you can separate the mounting structure on the rear from the LED strip. To make it easy, take a photo of the inside assembly so that you will remember how to reassemble it. Be careful not to bend the metal structure as you separate the two pieces.
Choose a Knockout

Carefully remove one of the circular knockout holes from the mounting structure. This is where the cord will go so be sure to think about where you'll be installing your fixture. Ours is ceiling mounted so we're going to use the center knockout. If you're going to plug yours into an outlet, one of the end knockouts might be better for your situation.
Trace Mounting Structure Holes


Find the horizontal and vertical center lines of the 50” top piece and draw lines to help you place your mounting structure in the center of the board. Find the center of the mounting structure and align it with the center marks you just made. Use a pencil to transfer the mounting structure’s keyholes to the top piece. Make sure to also trace the outline of the knockout hole you've chosen.
Drill Mounting Holes and Power Cord Access

Use the 1-1/4” spade bit to drill the hole for the knockout and the 1/4” twist bit for the mounting keyholes. Ensure that the strain relief connector will clear the sides of the center hole, if not remove more material until it does. It should not be visible when the fixture is hanging.
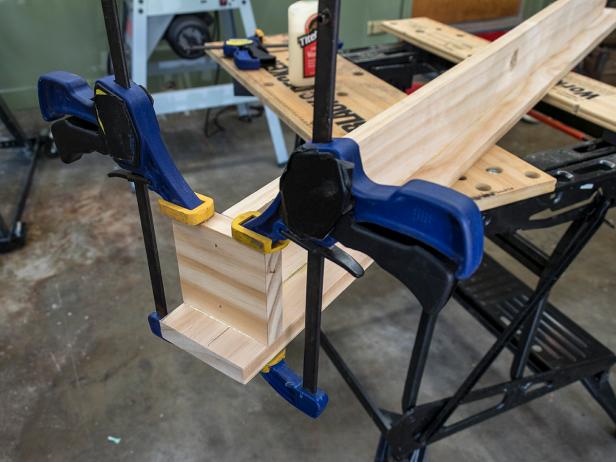
Attach the First Side to Top
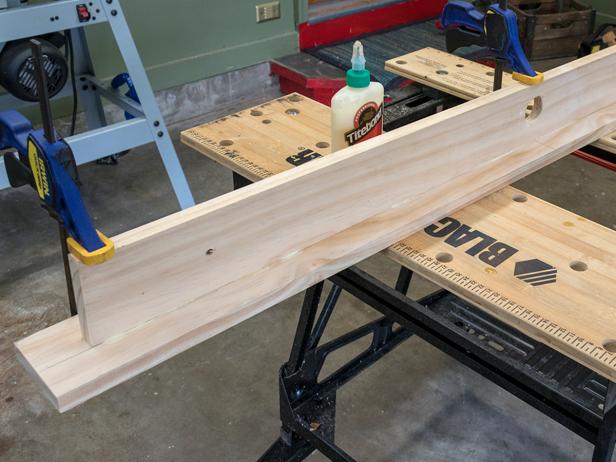
On one of the side pieces, draw a horizontal line 2” up from the bottom edge. Then mark the centerline of that side. Run a thin bead of glue down one edge of the top piece, and clamp it on to the side as shown. Make sure that you’re centered in the middle and level on the left and right sides. Apply slight pressure with three clamps and wait for the glue to dry.
Attach the Ends
Glue on the end pieces and clamp those in place. Wait for them to dry and attach the second side piece in the same fashion. When all of the glue is dry, put some finish nails into each side and the end pieces to give it a little more support. Clean up any excess glue, fill nail holes with putty and sand off any visible pencil lines.
Apply Your Favorite Finish

At this point, you can apply the finish of your choosing. You’ll want to use primer if you plan on painting and a wood conditioner if you plan on staining. Make sure to follow the instructions on the finish of your choosing and give it plenty of time to dry before you move on to the next step.
Install the Hanging Hardware


When it is completely dry, flip the fixture on its side and with the deeper-end facing you, insert the eye bolts from the top then attach the mounting structure. Secure the two nuts to the ends of the eye bolts and make sure your mounting structure is secure. Measure the hanging height and install cables, chains or decorative rope to the eye bolts.
Insert and Secure the Power Cord


Slide the strain relief clip about 10” down one end of the lamp cord. Tighten the two screws and make sure they are secure. Cut the fabric from the cord end gently and strip the cable ends. Push the strain relief clip through the top of the light and tighten the nut inside the mounting structure.
Reassemble the LED Fixture


Reattach the LED fixture and its ballast to the inside of the mounting structure. Match the black and white wires from the cord to the wires on the ballast. If you have a ground wire you can attach it to the green wire. If not, make sure the green wires are attached to the mounting structure as shown. Twist all the connections together and secure them with wire-nut caps and reassemble the light fixture.
Attach a Plug End if Needed

If you’re going to plug your fixture into an outlet, you’ll need to install a plug on the opposite end of the wire as shown. It’s a simple procedure, just make sure to follow the instructions on the package. If you’re mounting your fixture to the ceiling, you just need a cover for the junction box and you can wire it in directly. (Make sure to get turn off the breaker before you do this.) Install two eye screws or hooks into your ceiling the same width as your fixture's hanging hardware and you're ready to turn it on.

0 Comments